Knowledge base
Fliteboard
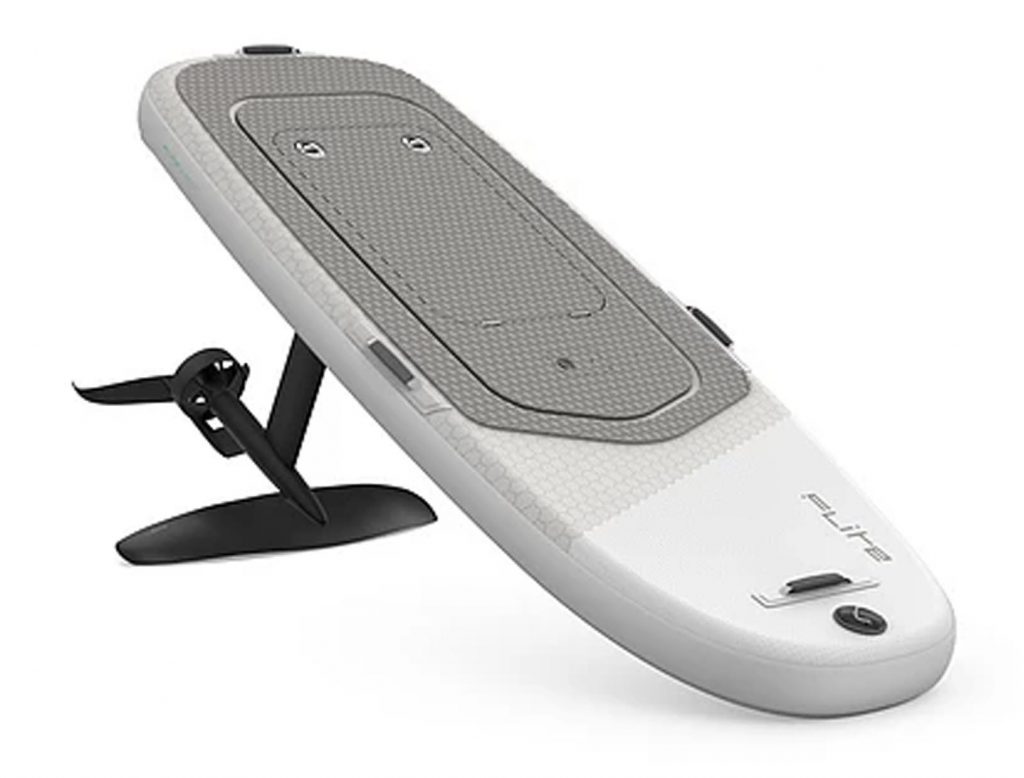
Here you can find additional resources and information about one of our most popular water toys – The Fliteboard.
Get it fixed
Fliteboard Repair
Need help?
Learn about warranty, repairs and preventive maintenance for your Fliteboard.
24H rapid service!
Talk directly via WhatsApp with one of our Seabob technicians.
How-to
Before attempting to Fliteboard for the first time, read the manual and pay special attention to the warnings and disclaimers. Most injuries can be avoided by using proper technique when learning.
Flite controller
How to pair Flite contoller series 2
– Hold the + button for 7 seconds until the words ’PRESS MODE TO COMMENCE PAIRING’ appear. Then press mode button to confirm. The words ‘LOOKING FOR NEW PAIR’ will appear.
– Open the Flitecell lid and place the Flitecell clip on the Flitecell to keep it powered on.
– Place the base of the Flite controller on the pairing target on the eFoil(between the Flitecell cables).
– Whilst searching for a new pair, the LED lights at the rear of the board will display as Orange chasing (scrolling over and over).
– Once paired successfully, the LEDs will change to a solid light blue colour.
– Remove the Flitecell clip and shut the Flitecell lid.
– Perform the next operation within 10 seconds (before the Flitecell switches off and powers off the system) or place the Flitecell clip on the Flitecell to keep it powered on.
DO NOT HOLD THE FLITE CONTROLLER IN THE PAIRING POSITION FOR LONGER THAN NECESSARY. A LONG HOLD WITHOUT THE SYSTEM PAIRING WILL EITHER POWER DOWN THE SYSTEM (FLITECELL SWITCHING OFF) OR PUT THE BOARD INTO SOFTWARE UPDATE MODE REQUIRING THE BOARD TO BE RESET BY DISCONNECTING FLITECELL POWER LEADS AND RECONNECTING.
This will prevent injuries due its weight.
How to pair Flite contoller series 1
– Hold the + button for 5 seconds until the words ’Looking for new pair’ appear on the screen.
– Place and hold the base of Flite Controller on the arming pad on the board receiver (same position for pairing and arming). The light blue LED should be flashing on the receiver.
– Hold this position for 10 seconds at least or until paired. Fliteboard will be paired when you see three quick successive light blue flashes from the receiver and then a sold light. The Flite Controller will now display the Flitecell percentage instead of ‘looking for new pair.’
DO NOT HOLD THE FLITE CONTROLLER IN THE ARMING POSITION FOR LONGER THAN NECESSARY. A 20 SECOND HOLD WILL PUT THE BOARD INTO SOFTWARE UPDATE MODE REQUIRING THE BOARD TO BE RESET BY DISCONNECTING FLITECELL POWER LEADS AND RECONNECTING.
How to charge Flite controller
– Remove Flite Controller from the accessories pouch. (Located in the eFoil bag).
– Remove Flite Controller USB Wall Charger and Charging Cable from the accessories pouch.
– Carefully peel out the rubber cover on the underside of Flite Controller. Attach the magnetic charging plug, ensuring the charging pins are connected.
– Plug in the USB Wall Charger and turn on. When the Flite Controller is charging correctly, the screen will show a charging message. After a few minutes the screen will hibernate to speed the charging process. Be careful not to disconnect the magnetic charging plug whilst charging. Always check to ensure the Flite Controller is at least 50% charged before each use.
Fliteboard
How to turn on Fliteboard
– Make sure you have connected everything and be certain nothing is caught in the seal. Carefully close the lid.
– Twist and lock the two lid latches.
– A few seconds after the lid is shut in position, you will hear a
‘beep beep beep’ which signifies that the Flitecell and board have automatically turned on.
– If the external board light is not active, open the lid and ensure the power cables are properly connected, and there are lights on the Flitecell indicating it is switched on.
– Flitecell will automatically turn off 10 seconds after the lid is opened.
How-to assemble Fliteboard Air
How to assemble Fliteboard Air
1 Unroll Fliteboard AIR bladder face down.
2 Place the rigid core (Flitebox cavity side up) on a flat surface.
3 Slide bladder onto core from front end first.
4 Ensure bladder is well tucked into the recess along the front edge of the core.
5 Carefully stretch bladder over one rear corner first.
*Note that the rear underside edges of the core are deliberately shorter than the top face to make fitment of the bladder faster.
Stretch the bladder over the last corner. Again, be careful that the bladder is positioned evenly and not creased or caught.
6 Check bladder is seated correctly around the core before carefully flipping the Fliteboard AIR over.
7 Twist the valve cap anti-clockwise to remove.
8 To inflate, push the central valve down.
9 Twist anti-clockwise to release.
10 The valve will pop up. This ensures the bladder will not deflate when you remove the hose after inflation.
11 Connect pump hose to valve and inflate bladder to 15 – 16 PSI.
12 Once inflated to 15 – 16 PSI, twist the pump hose anti-clockwise to remove and re-fit the valve cover cap. When disconnecting the pump hose, no air should escape from the valve. If the bladder deflates you must release the central valve (see step 2) and re-inflate. Fliteboard AIR is now inflated.
How to assemble Fliteboard
CONNECT THE eFOIL to Fliteboard
1 Remove the Fliteboard from its bag and place upside down on the bag or other protective surface. Locate the Flitebox cavity on the bottom of the board and ensure the 4 retaining screws are removed.
2 Check to ensure the orange o-ring is inserted, properly seated in the Flitebox cavity o-ring groove, clean and free of sand,
grit or water.
3 Carefully lift the eFoil from its bag and place the Flitebox into the cavity. While doing this ensure the power cables feed through into the Fliteboard cavity.
4 Ensure the Flitebox is properly seated in the cavity and flush with the board surface.
5 Insert the 4 x 20mm Stainless Steel Hex fasteners. Tighten them in
a cross pattern, first using your fingers to ensure the threads are properly engaged, and then using the supplied hex key. Use a torque of 6 Nm to tighten the fasteners.
6 Medium force needs to be applied when using the long arm of the hex key to ensure the fasteners are tight.
7 When properly tightened, the eFoil should be secured and the o-ring compressed. Failure to properly tighten the fasteners or fit the o-ring will result in a board leak.
8 Be careful not to over-tighten the fasteners as this could result in stripped threads or damaged fasteners.
CONNECT FUSELAGE TAIL
1 With the board upside down and the eFoil connected, take the
20cm long aluminium fuselage tail from the travel bag and insert into the fin under the propeller guard. Add a light cover of Tef-Gel to the tail connection.
2 Add a thin layer of Tef-Gel from the tube supplied to the thread of the supplied 12mm fastener bolt and carefully tighten using the hex key using torque of 6 Nm.
CONNECT THE WING
1 Remove your front wing from the travel bag and from its wing cover (if attached – depending on model).
2 Place the wing in position as shown.
3 Insert the 3 fasteners taking care to ensure the correct set is being used for the particular wing model you are fitting (Refer to page 15). ALWAYS add Tef-Gel to the fasteners first. The fasteners should extend by approximately 6mm through the Wing when placed in the countersunk holes.
4 Tighten the fasteners with the supplied hex key, ensuring the fasteners are tight enough that the wing cannot move or wobble significantly during use. Use a torque of 6 Nm to tighten the fasteners.
CONNECT THE STABILISER WING
1 Take the Stabiliser Wing from the travel bag and remove the wing cover.
2 Take the correct Stabiliser Wing shim from the accessories pouch and fit between the Stabiliser Wing and the fuselage tail.
3 Connect the orange power cable to the orange power connector in Flitecell. You will feel a secure click when properly engaged.
4 To ensure correct mounting, direction and placement, the wing when installed correctly should have the wings tips facing away from you (the countersunk thread is an indication of this). The correct direction, is that of the rounded, curved leading edge facing the front wing.
ALWAYS ADD TEF-GEL TO THE STAINLESS STEEL FASTENERS THAT ARE BEING INSERTED INTO THE ALUMINIUM. IF LEAVING WINGS ATTACHED FOR EXTENDED PERIODS, ENSURE THAT YOU LOOSEN FASTENERS AND RE-APPLY TEF-GEL EVERY FEW WEEKS. FAILURE TO DO SO MAY RESULT IN CORROSION AND DAMAGE TO YOUR EFOIL FASTENER INSERTS.
CONNECT FLITECELL TO FLITEBOARD
With the eFoil, fuselage tail and wings attached, it’s time to carefully turn your board over so it stands on BOTH the front wing and nose of the board.
1 Twist the Lid Latches and open the board Lid.
2 Take Flitecell by the handle and carefully lower it into the board cavity, ensuring to move cables out of the way first. The warning label should be facing up.
3 Connect the orange power cable to the orange power in Flitecell. You will feel a secure click when properly engaged.
4 Connect the black power cable to the black power in Flitecell.
How to replace Fliteboard propeller
REMOVAL:
1. Place the eFoil in a support mount or similar fixture to hold it securely.
2. To remove propeller, use 13mm thin-walled socket while holding it with a soft cloth wrapped around it.
3. Undo the M8 Nylon lock nut (right-hand thread – counterclockwise).
4. Use a plastic pry tool between the propeller and the End Cap to remove the propeller from the motor shaft.
IMPORTANT: Do not use a pry tool that will scratch the anodizing on the End Cap as it will need to be replaced if so.
5. Remove the propeller pin and inspect for damage as per below.
INSTALLATION:
1. Place the eFoil in a support mount or similar fixture to hold it securely.
2. Ensure the propeller and the shaft is clean and clear of debris.
3. Place the propeller pin through the hole in the shaft.
4. Slide the propeller carefully onto the shaft. Ensure the propeller is seated correctly with the propeller pin.
5. Tighten the M8 nylon lock nut (right-hand thread – clockwise) while holding the propeller.
Flitecell
How to charge Flitecell
– Remove Flitecell from its travel bag.
– Place Flitecell in a cool dry location away from flammable or hot items.
– Connect Flitecell charger plugs to Flitecell terminals ensuring to connect the orange (positive) connector to the orange terminal first and the black (negative) connector to the black terminal.
– Check that connections have been made correctly. Plug the
charger in the wall socket. A supplied magnet located in the accessories pack, is required to be placed on Flitecell, as shown by arrow, (5 – 10 seconds) to activate charging. If the magnet has been misplaced, you can use the base of Flite Controller to initiate charging.
– The charger will automatically turn off when the charging process is complete.
How to balance & optimise Flitecell
– The battery management system (BMS) balances and optimises Flitecell during each charge cycle.
– It is recommended to leave the Flitecell connected to a powered off charger after a full charging cycle, with the magnet still connected (this keeps the Flitecell On only).
– This ensures that both the terminals +/- are protected from shorting and the cells within the Flitecell continue to self-balance between use.
How to assemble Fliteboard
CONNECT THE eFOIL to Fliteboard
1 Remove the Fliteboard from its bag and place upside down on the bag or other protective surface. Locate the Flitebox cavity on the bottom of the board and ensure the 4 retaining screws are removed.
2 Check to ensure the orange o-ring is inserted, properly seated in the Flitebox cavity o-ring groove, clean and free of sand,
grit or water.
3 Carefully lift the eFoil from its bag and place the Flitebox into the cavity. While doing this ensure the power cables feed through into the Fliteboard cavity.
4 Ensure the Flitebox is properly seated in the cavity and flush with the board surface.
5 Insert the 4 x 20mm Stainless Steel Hex fasteners. Tighten them in
a cross pattern, first using your fingers to ensure the threads are properly engaged, and then using the supplied hex key. Use a torque of 6 Nm to tighten the fasteners.
6 Medium force needs to be applied when using the long arm of the hex key to ensure the fasteners are tight.
7 When properly tightened, the eFoil should be secured and the o-ring compressed. Failure to properly tighten the fasteners or fit the o-ring will result in a board leak.
8 Be careful not to over-tighten the fasteners as this could result in stripped threads or damaged fasteners.
CONNECT FUSELAGE TAIL
1 With the board upside down and the eFoil connected, take the
20cm long aluminium fuselage tail from the travel bag and insert into the fin under the propeller guard. Add a light cover of Tef-Gel to the tail connection.
2 Add a thin layer of Tef-Gel from the tube supplied to the thread of the supplied 12mm fastener bolt and carefully tighten using the hex key using torque of 6 Nm.
CONNECT THE WING
1 Remove your front wing from the travel bag and from its wing cover (if attached – depending on model).
2 Place the wing in position as shown.
3 Insert the 3 fasteners taking care to ensure the correct set is being used for the particular wing model you are fitting (Refer to page 15). ALWAYS add Tef-Gel to the fasteners first. The fasteners should extend by approximately 6mm through the Wing when placed in the countersunk holes.
4 Tighten the fasteners with the supplied hex key, ensuring the fasteners are tight enough that the wing cannot move or wobble significantly during use. Use a torque of 6 Nm to tighten the fasteners.
CONNECT THE STABILISER WING
1 Take the Stabiliser Wing from the travel bag and remove the wing cover.
2 Take the correct Stabiliser Wing shim from the accessories pouch and fit between the Stabiliser Wing and the fuselage tail.
3 Connect the orange power cable to the orange power connector in Flitecell. You will feel a secure click when properly engaged.
4 To ensure correct mounting, direction and placement, the wing when installed correctly should have the wings tips facing away from you (the countersunk thread is an indication of this). The correct direction, is that of the rounded, curved leading edge facing the front wing.
ALWAYS ADD TEF-GEL TO THE STAINLESS STEEL FASTENERS THAT ARE BEING INSERTED INTO THE ALUMINIUM. IF LEAVING WINGS ATTACHED FOR EXTENDED PERIODS, ENSURE THAT YOU LOOSEN FASTENERS AND RE-APPLY TEF-GEL EVERY FEW WEEKS. FAILURE TO DO SO MAY RESULT IN CORROSION AND DAMAGE TO YOUR EFOIL FASTENER INSERTS.
CONNECT FLITECELL TO FLITEBOARD
With the eFoil, fuselage tail and wings attached, it’s time to carefully turn your board over so it stands on BOTH the front wing and nose of the board.
1 Twist the Lid Latches and open the board Lid.
2 Take Flitecell by the handle and carefully lower it into the board cavity, ensuring to move cables out of the way first. The warning label should be facing up.
3 Connect the orange power cable to the orange power in Flitecell. You will feel a secure click when properly engaged.
4 Connect the black power cable to the black power in Flitecell.
Maintenance
Fliteboard is more than a surfboard. Similar to any other electric powered vehicle, it needs to be serviced regularly and maintained to ensure good working order and to prevent breakage.
It is essential that your Fliteboard be serviced as per the ‘Maintenance schedule’ to retain its high level of performance, safety, reliability, and warranty. The service intervals are once per year or every 100 hours, whichever comes first.
Please refer to the video below for instructions around care & maintenance of your Fliteboard.
Maintenance Guidelines
General maintenance
FLITEBOARD STANDARD/PRO/ ULTRA
– Apply lubricant / WD40 to the latches and hinges every few weeks. Keep the lubricant away from the deck grip to avoid a slippery board.
– Check the board regularly for damage or cracks. If damage is present have it repaired by a professional surfboard or sailboard repairer who is experienced with epoxy repairs.
– Inspect the orange, mast flange seal regularly for any damage and ensure its is kept clean and free of any sand, grit or dirt.
– During daily use ensure that the eFoil is removed from the board and wings from the eFoil at least every three days. Ensure Contact Cleaner is applied to all cables and Tef-Gel is reapplied to all screws.
FLITEBOARD AIR
– The inflatable bladder can be repaired using the supplied repair kit.
– 15 – 16 PSI is the recommended inflation pressure.
FLITEBOARD MAST
– Disassemble the eFoil from the board.
– Remove the wing, fuselage cover and tail, and clean thoroughly with fresh soapy water to remove any built-up salt or sand.
FLITE CONTROLLER
– Pre and post season, the 3 torque screws on the underside of the controller can be undone to release the trigger. This will allow you thoroughly clean and inspect both the trigger, spring and magnet.
FLITECELL
– Examine the charger regularly for damage to the cord, plug, enclosure or other parts.
Post ride maintenance
FLITEBOARD STANDARD/PRO/ULTRA
– Open the board lid slowly, take care not to let it fall on the nose of the board. (If the lid is opened too far it may fall and damage the nose of the board).
– After each ride, check to see if any water has leaked into the Flitecell cavity. If so, check the cause of the leak which may include: sand present on the sealing surface; a damaged or dislocated seal; damaged hinges or latches; or something obstructing the lid when closed.
– Once the Flitecell has been removed ensure that the complete board, including Flitecell compartment, seals, lid and eFoil are washed thoroughly in fresh water. Let the board air dry and then wipe down with a clean, dry absorbent cloth. Ensure that Contact Cleaner is sprayed onto all connections.
FLITEBOARD AIR
– Wash the inflatable bladder with warm soapy water and dry before storage.
– The inflatable bladder can remain inflated, or be deflated and stored on or off the carbon insert to suit your storage preference.
FLITEBOARD MAST
– Disconnect the Flitecell power cables.
-Disconnect the data cables, both receiver and Flitecell CANbus cable (Series 1).
– Rinse thoroughly with clean fresh water after every use. Dry thoroughly.
– Rinse the inside of the mast (through the notch in the rear of the flange) with fresh water.
– Rinse around the mast flange to wash salt away from the board connection area (if keeping the board and foil attached).
FLITE CONTROLLER
– Rinse the Flite Controller in fresh water to clean away salt and debris. Ensure a steady stream of fresh water is applied directly into the trigger housing. While doing so press and de-press the trigger numerous times to loosen any sand, grit, debris that may affect its performance.
– Peel out the rubber cover on the underside and clean this with fresh water. Ensure this area is dry before replacing the cover.
FLITECELL
– Wipe Flitecell down with a wet cloth (freshwater), and clean Flitecell contacts and data connector with Contact Cleaner.
– Flitecell is water resistant but it should remain dry where possible. DO NOT submerge or shower.
– Avoid placing Flitecell on the sand, which can make its way into the Flitecell cavity and scratch surfaces.
– DO NOT charge the Flitecell immediately after use. The Flitecell temperature may be too high. Allow 30mins between riding and charging to allow for cooling.
– DO NOT clean the Flitecell or charger with denatured alcohol or other flammable solvents.
*IF THE BOARD HAS LEAKED AND / OR THE FLITECELL HAS BEEN SUBMERGED IN WATER, INSPECT FOR WATER INGRESS USING THE SIGHT GLASS LOCATED ON THE SIDE OF THE FLITECELL.
STAND THE FLITECELL UP ON ITS BOTTOM END FOR ONE MINUTE AND THEN PLACE THE FLITECELL ON ITS SIDE WITH THE SIGHT GLASS FACING DOWN FOR ONE MINUTE. INSIDE THE SIGHTGLASS IS A COLOUR CHANGING LABEL WHICH WILL TURN RED IF WATER IS PRESENT. INSPECT THE SIGHT GLASS AND CONFIRM THAT WATER IS NOT PRESENT BEFORE CHARGING AND
USING A FLITECELL THAT HAS BEEN IMMERSED IN WATER.
IF A FLITECELL HAS BEEN DROPPED OR DAMAGED, CONTACT YOUR NEAREST SERVICE CENTRE IMMEDIATELY AND DO NOT USE THE FLITECELL.
Storage
– Fliteboard equipment be stored and if required, charged between 22°C (72°F) and 28°C (82°F) in a safe, dry place that is away from flammable objects/surfaces for maximum safety, optimum performance and longevity.
– Fliteboard and its components (Flitecell, Flite Controller, eFoil, Wings and Board) must not be used, charged, or stored below 0°C (32°F) or over 40°C (104°F) ambient temperatures as it can result in permanent damage to the components and void warranty.
– When storing and not using the Flitecell or Flite Controller for greater than 1 week (long term storage), they should be discharged to a capacity between 50% – 75% for maximum safety. The Fliteboard components should also be stored in their relevant bags when not in use or charging to protect and prevent damage to them.
– After long term storage of your Fliteboard components and before use, you are required to charge the Flitecell and Flite controller to 100% using the supplied Fliteboard chargers. These charging processes may take longer than normal (up to 24 hours) but this gives you time to inspect and perform routine maintenance and checks before your ride.
FLITEBOARD STANDARD/PRO/ULTRA/AIR
– Ensure that all sand, grit, dirt, and salt residue has been washed off with fresh water, and sufficiently dried.
– Ensure that the Flitecell has been wiped down with a clean, dry absorbent cloth while switched off.
– Ensure the board and deck grip are dry before storage.
– Apply Contact Cleaner to all connectors to reduce the risk of corrosion.
– Take extra care not to scratch the carbon board bottom and wings.
– Place your Fliteboard in the provided bag, then store in a clean and dry environment.
– Keep the board and bag out of the sun.
FLITEBOARD MAST
– Always store the eFoil in a clean, dry environment.
FLITE CONTROLLER
– Store in a cool dry place, out of the sun.
FLITECELL
– Keep Flitecell stored out of the reach of children and pets.
– DO NOT store the Flitecell near heat sources such as a furnace or heater.
– DO NOT leave the Flitecell inside of a vehicle on hot days.
– The ideal storage temperature is 22°C – 28°C.
– DO NOT store the Flitecell whilst charging. Disconnect the charger when not in use.
– DO NOT store the Flitecell fully charged or discharged for a longer period of time.
– For long term storage a charge state of 75% (2 LEDs on) is optimal.
– We recommend that you discharge the Flitecell during your final session of the season and charge back up to the above state.
Troubleshooting
If you’re having an issue with your Fliteboard, you may be able to find out what’s wrong using the process of elimination.
Make a list of things that could be causing the problem and then test them out one by one to eliminate them. Once you’ve identified the source of your computer issue, it will be easier to find a solution.
Flite Controller troubleshooting
Can't charge Flite controller
Check that the Flite Controller connector and the charge cable are free from corrosion. Apply contact cleaner to the connector pins.
Try exchanging the charging cable. Try exchanging the wall plug.
If you are still unable to charge your Flite Controller, contact Fliteboard service.
Flite controller disconnects
Re-arm the Flite Controller. See arming instructions.
Flite controller unpairs
Re-pair the Flite Controller. See pairing instructions.
Flite controller won't turn on
Ensure Flite Controller is fully charged. See Flite Controller charging instructions.
Flite controller shows a battery warning
Slow down or decrease power consumption to cool the Flitecell down.
The Flite Controller will warn you when the Flitecell temperature reaches 55°C and again at 60°C.
At 65°C the Flitecell will automatically start to shut down to preserve itself.
Unable to pair Flite controller
Please ensure no other controllers or boards are switched on.
Try again as per pairing instructions.
Unable to pair Flite Controllers to multiple boards
Do not attempt to pair multiple Flite Controllers to multiple Fliteboards simultaneously.
IMPORTANT: Always pair one at a time.
Information on Flite controller are missing
Check all your connections.
Clean all contact points with contact cleaner. Be sure to keep these contact points clean of saltwater after riding and before storing.
Be sure that all of the connection pins are in tact. If any pins are corroded or broken, please contact Fliteboard Support at fliteboard.com/contact.
Reconnect and retry.
Fliteboard troubleshooting
Fliteboard starts to slow or go into 'limp home' mode
This is a sign your Flitecell is about to run down or over heat.
Move out of the water and recharge your Flitecell.
Refer to the Flitecell charging instructions.
Fliteboard turns off while riding
Fliteboard turns off while riding
Move out of the water to a safe, dry, clean area.
Check the LED on Flitecell to confirm if it still has charge.
If it has charge, disconnect and reconnect the Flitecell to see if you can establish a connection. Inspect the Flitecell for water or damage.
There should be no water inside the Flitecell housing.
Water in the Fliteboard cavity
Remove the board from the water.
Remove the Flitecell.
Dry the board completely.
Check the Flitecell for leaks.
If the Flitecell has taken in water refer to the section below.
Once dried and re-assembled, take care that the Fliteboard cavity seal is properly compressed when closing the Fliteboard lid.
If there is no damage to the seal then it is likely that you need to tighten the latches on your board lid. To do this, open the board lid.
There is an Allen screw for each latch. Add Loctite to these screws before screwing in tight with an Allen key. Tighten firmly but do not over tighten. Be care not to bend the black plastic latch cap.
Reduced run time
The battery management system (BMS) balances and optimises the battery during each charge cycle.
Leave the charging magnet on Flitecell for 24 – 48 hours after between charges to allow the BMS to optimise Flitecell.
Broken connector pins
Connector will have to be replaced. Please contact official Fliteboard service center to resolve the issue.
Unable to connect (no lights on receiver)
Clean all contact points with contact cleaner. Be sure to keep these contact points clean of saltwater after riding and before storing.
Be sure that all of the connection pins are in tact. If any pins are corroded or broken, please contact Fliteboard Support at fliteboard.com/contact.
Reconnect and retry.
Unable to connect (lights on receiver)
Make sure that your Flite Controller software is up to date
Flitecell troubleshooting
Unable to charge Flitecell
Allow the battery to cool down before you can charge it.
Make sure that your charger is connected to an active power point.
Check that the connectors are connected to the correct pins. (Correct polarity) Orange to orange and black to black.
To activate the charging process of your Flitecell please use the charging magnet or the butt of your Flite Controller.
You may need to reactivate the charging process if the Flitecell does not fully charge.
Unable to charge Flitecell to 100%
Reactivate the charge with the magnet.
You can use the butt of the Flite Controller to reactivate the charging process.
Flitecell not activating board
Leave the lid of the board open and try to activate your battery with the magnet on your Flite Controller.
If no light turns and you are certain you have a charged Flitecell, contact support.
If the light turns on we know the battery is working. Try again to close the lid and latches and see if it activates this time.
Water in Flitecell
Flitecell has an indicator for water damage. If water has penetrated the casing, regularly check the circular water indicator on the side of your Flitecell.
If the sticker has turned red, this means water has penetrated the housing.
IF WATER HAS PENETRATED THE FLITECELL, PLEASE SET FLITECELL ASIDE IN A COOL DRY PLACE. DO NOT ATTEMPT TO USE A FLITECELL THAT HAS BEEN WATERLOGGED.
CONTACT YOUR SERVICE CENTER IMMEDIATELY.
Flitecell duration not as expected
There are several reasons you may not experience the maximum ride time and those include:
-weight of the rider
-wind
-current
-speed (faster the speed the faster the battery drains)
-water quality
Documents
Safety
Safety concerns
Hydrofoil safety
The Fliteboard hydrofoil system comprises a mast (or strut), a main wing and stabiliser wing. These components include sharp trailing edges and wing tips. Take care not to kick or hit the sharp edges when in the water or when climbing on to the board.
The best way to avoid injury and stay clear of the foil and propulsion system is to practice the correct falling technique. As soon as you begin to loose balance, purposely fall in the direction the board is already falling. You will then likely end up in the water on the opposite side to the hydrofoil assembly.
1. FALLING ON THE HYDROFOIL CAN CAUSE SERIOUS INJURY OR DEATH.
2. ALWAYS WEAR AN APPROVED PERSONAL FLOTATION DEVICE (PFD) WHEN FLITEBOARDING.
3. ALWAYS WEAR A HELMET WHEN FLITEBOARDING.
4. ENSURING SAFE WATER DEPTH IS EXTREMELY IMPORTANT BEFORE RIDING. SELECT A LOCATION THAT IS HAS A MINIMUM DEPTH OF AT LEAST 1.5 METERS.
5. ALWAYS MONITOR BATTERY USAGE WHILE RIDING AND TAKE CARE NOT TO DEPLETE THE BATTERY BEFORE RETURNING TO YOUR POINT OF ORIGIN.
6. NEVER RIDE FLITEBOARD FURTHER FROM SHORE THAN YOU ARE PREPARED TO SWIM BACK.
IMPORTANT: TAKE EXTREME CARE TO ENSURE THAT ALL BODY PARTS ARE CLEAR OF THE PROPELLER WHEN TESTING ON LAND AND WHEN IN THE WATER.
Rider safety
1. Wear a helmet and PFD
Wear an approved and certified helmet and PFD (Personal Flotation Device) at all times. There may be specific rules and legal requirements in your location that also apply.
2. Keep distance
Keep well clear of other water users at all times. Check regulations for vessel operating distance rules in your area. Always be on the lookout for swimmers, other vessels or obstacles when riding which may be obscured by waves or glare.
3. Release the throttle
Release the trigger immediately on committing yourself to a fall. This will stop the propeller and reduce the forces which could otherwise lead to a more extreme crash. Practice this skill when learning with the goal of stopping the propeller before you hit the water in a fall.
4. Fall away from Fliteboard
The best way to avoid injury is to practice the correct falling technique. As soon as you begin to loose balance, purposely fall in the direction the board is already falling. You will then likely end up in the water on the opposite side to the hydrofoil assembly. Like being on stilts – it is impossible to regain balance once your weight is no longer above the hydrofoil wings (unless you are turning).
Flitecell safety
Flitecell (battery) is a carefully engineered water resistant unit. If the battery is damaged (for example during transportation or handling) the seal may become compromised. A damaged battery that comes into contact with water may result in internal damage including corrosion which could result in a fire and or explosion.
1. USE THE BATTERY AT YOUR OWN RISK.
2. DO NOT OPEN FLITEBOARD LID UNDER ANY CIRCUMSTANCES WHILST IN WATER.
SIGNS OF A COMPROMISED BATTERY:
LOOSE SCREWS / RIVETS
CONNECTOR COMING LOOSE
CRACK IN HOUSING/CASE
DEFORMATION
BATTERY ACID ODOR
EXTREMELY HOT TEMPERATURE DURING CHARGING (80°C OR MORE )
3. CAREFULLY INSPECT THE BATTERY BEFORE EACH USE.
4. IF A BATTERY CASING HAS VISIBLE DAMAGE AND THE BATTERY FALLS INTO WATER, TAKE IT OUT IMMEDIATELY AND PUT IT IN A SAFE AND OPEN AREA. MAINTAIN A SAFE DISTANCE FROM THE BATTERY UNTIL IT IS COMPLETELY DRY. NEVER USE THE BATTERY AGAIN AND DISPOSE OF THE BATTERY PROPERLY.
4. THE BATTERY MUST BE USED IN TEMPERATURES FROM 0°C TO 40°C. USE OF THE BATTERY IN ENVIRONMENTS ABOVE 40°C CAN LEAD TO A FIRE OR AN EXPLOSION. USE OF BATTERY BELOW 0°C CAN LEAD TO PERMANENT BATTERY DAMAGE.
5. ALWAYS KEEP THE BATTERY DRY. IF THE BATTERY HAS BEEN EXPOSED TO WATER. PLACE IN A COOL DRY PLACE.
6. DO NOT DROP OR STRIKE THE BATTERY.
7. DO NOT PLACE HEAVY OBJECTS ON THE BATTERY OR CHARGER.
8. DO NOT CHARGE OR USE A DAMAGED BATTERY. IF YOUR BATTERY IS ABNORMAL CONTACT FLITEBOARD OR AN AUTHORIZED FLITEBOARD DEALER FOR FURTHER ASSISTANCE.
9. DO NOT USE THE BATTERY IF IT WAS INVOLVED IN A CRASH OR HEAVY IMPACT.
10. DO NOT USE A NON FLITECELL BATTERY. ANY DAMAGE CAUSED BY A NON FLITECELL BATTERY WILL NOT BE COVERED BY WARRANTY.
11. DO NOT DISASSEMBLE THE BATTERY IN ANY WAY OR THE BATTERY MAY LEAK, CATCH FIRE, OR EXPLODE. ELECTROLYTES INSIDE THE BATTERY ARE HIGHLY CORROSIVE.
12. DO NOT HEAT BATTERIES. KEEP AWAY FROM HEATING SOURCES AND OUT OF DIRECT SUNLIGHT.
13. DO NOT PUT BATTERIES IN A MICROWAVE OVEN, FREEZER OR IN A PRESSURIZED CONTAINER.
14. DO NOT OPEN LID UNDER ANY CIRCUMSTANCES WHILST IN WATER OR WITH WET HANDS.
IN CASE OF A BOARD/BATTERY FIRE EXTINGUISH WITH:
COLD WATER WITHOUT ADDITIVE
DRY POWDER IN LARGE AMOUNT (USE METAL FIRE EXTINGUISHER POWDER OR DRY SAND IF ONLY A FEW CELLS ARE IMPACTED)
FOR FURTHER INFORMATION ABOUT INCIDENT RESPONSE AND DISPOSAL. PLEASE REFER TO THE MSDS.
DISPOSE OF THE BATTERY IN SPECIFIC RECYCLING BOXES ONLY AFTER A COMPLETE DISCHARGE. DO NOT PLACE THE BATTERY IN REGULAR TRASH CONTAINERS.
STRICTLY FOLLOW YOUR LOCAL REGULATIONS REGARDING THE DISPOSAL AND RECYCLING OF BATTERIES.
Need help?
Ask for support
Reach out for personalized quotations or special arrangements.
Email[email protected]Phone
+33 781 15 12 54
Send an inquiry instead
Alternatively fill out the form and send us an inquiry. We will come back to you the old fashioned way. In a flash!
Subscribe to our Newsletter
Stay informed
Receive Special offers and stay informed about the latest developments in the world of Water Toys.
In order to understand how we use and protect your personal information, please read our privacy policy.
Water toy rentals. Both sides of The Atlantic
We deliver. Anytime. Anywhere.
Trusted By


For over a decade, Ocean Premium has been providing water toy rentals to yachts and charter brokers. By consistently incorporating feedback from our clients and partners, we have honed our services to achieve excellence. The continuous collaboration with several hundred yachts attests to our superior performance.

Ships Worldwide

Best Prices

Need Advice